its mince pie season

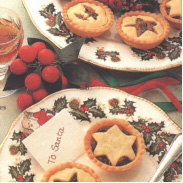
Mince Pies

Image Credit: Odlums

Yes, Tis the season for mince pies! But how do you feel about them? I’m extremely picky when it comes to mince pies, I only like homemade ones, simply because I think there’s a drastic difference in taste and all round quality. So I’m giving you the best recipe I know, which of course is Odlums mince pies.

Ingredients:

  • 125g plain flour
  • 125g caster sugar
  • 100g packet of ground almonds
  • 125g margarine (room temperature)
  • 1 egg (beaten)
  • A little water, if necessary

Filling:

450g homemade mincemeat (Odlums recipe says to use a pre-made jar but homemade is always tastier)

Method:

  1. Preheat the oven to 200°C. Lightly grease the bun tins.
  2. Put flour sugar and ground almonds into a large bowl and mix well.
  3. Rub margarine through dry ingredients. Add the egg and water, if required, and mix to soft dough.
  4. Turn onto a lightly floured board and knead.
  5. Cover in clingfilm and put into the fridge until ready to use. (the pastry will keep for three days)
  6. Roll pastry on a floured board and cut rounds with a cutter to fit the greased bun tin.
  7. Put a teaspoon of mincemeat into each and using the remaining pastry, Create a lid to put on top.
  8. Bake for 15 minutes or until the pies start to go golden-brown.
Delicous Chocolate Mousse

Bubbly chocolate mousse

Bubbly chocolate mousse

Image and recipe credit: Dessert.net.au

My all time favorite dessert is a delicious bubbly Chocolate Mousse. While browsing for a mousse recipe last week, I managed to find this gem of a recipe.

Chocolate Mousse
  • 7 oz of milk or dark baking chocolate ( I like to mix it up with my favorite chocolate bars like Galaxy)
  • 3 large eggs, separated
  • 1 1/2 oz of golden caster sugar
Method:
  1. Place the broken up chocolate and 120 mil of warm water in a large mixing bowl and have it over a a saucepan of (barely) simmering water. Ensure that the bowl is not touching the water in any way. heat the water at a low temperature so the chocolate melts slowly. It should take 6-7 minutes
  2. Remove from the heat, and using a wooden spoon, stir well until glossy and smooth and let cool for 2-3 minutes.
  3. Stir in the egg yolks and blend well. Set aside.
  4. In a clean bowl, whisk the egg whites to the soft-peak stage.
  5. Whisk in the sugar, a 1/3 at a time and then whisk again untill the whites are glossy.
  6. With a metal spoon, fold a tablespoon of egg whites into the chocolate mix to loosen it, then carefully fold in the rest.
  7. The end of the recipe needs patients as the mix needs to be gently folded and cutting movements to retain the air which makes the mousse light.
  8. Place the mousse in the containers you plan on serving them in, cover with clingfilm and put in fridge for at least 2 hours.

Add some Whipped cream on top to serve. I prefer the whipped cream you get in a container as it is the tastiest and really compliments the chocolate mousse.

Nutella Chocolate Roulade

Nutella Chocolate Roulade


Image credit

This Nutella Chocolate Roulade is a mouth-watering take on the original Swiss Roll. My Auntie made this yesterday for my cousins 13th birthday and it was delicious. I was afraid she was going to keep this recipe a secret but she was nice enough to let me have it. So I am passing it on to you with high recommendation’s.

Ingredients:

  • Butter, for greasing
  • 100g plain chocolate
  • 4 eggs
  • 100g caster sugar, plus extra for dusting

For the filling:

  • 1/2 vanilla pod
  • 1 tablespoon dark rum or Tia Maria
  • 300ml cream
  • 75g Nutella chocolate spread
  • Icing sugar to decorate

Method:

  1. Grease a 33 x 23cm Swiss roll tin, line with greaseproof paper and then grease the paper. Break the chocolate into pieces and place in a bowl set over a pan of simmering water.
  2. separate the eggs and whisk the egg yolks with the sugar until very thick and pale colour. Beat in the egg whites until stiff, and then fold into the chocolate mixture.
  3. Pour into the prepared tin and spread out evenly. Bake for 20-25 minutes until well risen and firm to touch.
  4. Turn the sponge out onto a sheet of greaseproof paper that has been generously sprinkled with caster sugar. Carefully peel off the lining paper. Cover the roulade with warm, damp tea towel and leave to cool.
  5. To make the filling, split the vanilla pod in half and scrape out the seeds. Gently whisk with an electric mixer until stiff, then spread the Nutella over the cold roulade, followed by the cream mixture. Using the paper to help, roll up the roulade to enclose the filling. To serve, transfer the roulade on to a serving plate and dust with icing sugar, then cut into slices and arrange on serving plates.

Oreo Chocolate Sponge cake

barrys-18th-birthday-cake[2]

Here’s the finished product.

Image credit: Bloggers own image

So here is the recipe I used for my brothers guitar cake below. The only adjustment I made was doubling the amount of Oreo’s it originally said to use and using chocolate filled Oreo. I had to make three or four batches to construct the guitar shape. It was extremely fun making it and very rewarding afterwards to see all of his friends in shock when we came in with the cake and sparks shooting up from the firework-like candles! I found this delicious recipe; take a look yourself!

Ingredients:

  • 226g of Stork
  • 266g of caster sugar
  • 2 teaspoons of vanilla essence
  • 20 crushed chocolate crème Oreo cookies
  • 4 medium eggs
  • 270g of  self-raising flour
  • 1 pinch of salt
  • 2 teaspoons of milk

Method:

  1. Pre-heat the oven to 180 degree’s (fan assisted)
  2. Beat the stork in a baking bowl until light and fluffy
  3. Add sugar and vanilla essence to butter and beat together until well mixed
  4. Add eggs, one at a time and mix until mixture has doubled in size
  5. Add flour and salt and mix thoroughly
  6. Scrape down the sides of the bowl and then add in the milk
  7. Mix again until all ingredients are well incorporated
  8. Add in your 8 crushed Oreo cookies
  9. Pour mixture into your pre-greased baking tin
  10.  Bake in oven for 15-20 minutes. Sponge is ready when a skewer inserted in to the mixture comes out clean with no bits attached
  11. Once removed from oven, leave it to cool for 10 minutes then transfer to a wire rack to cool completely.